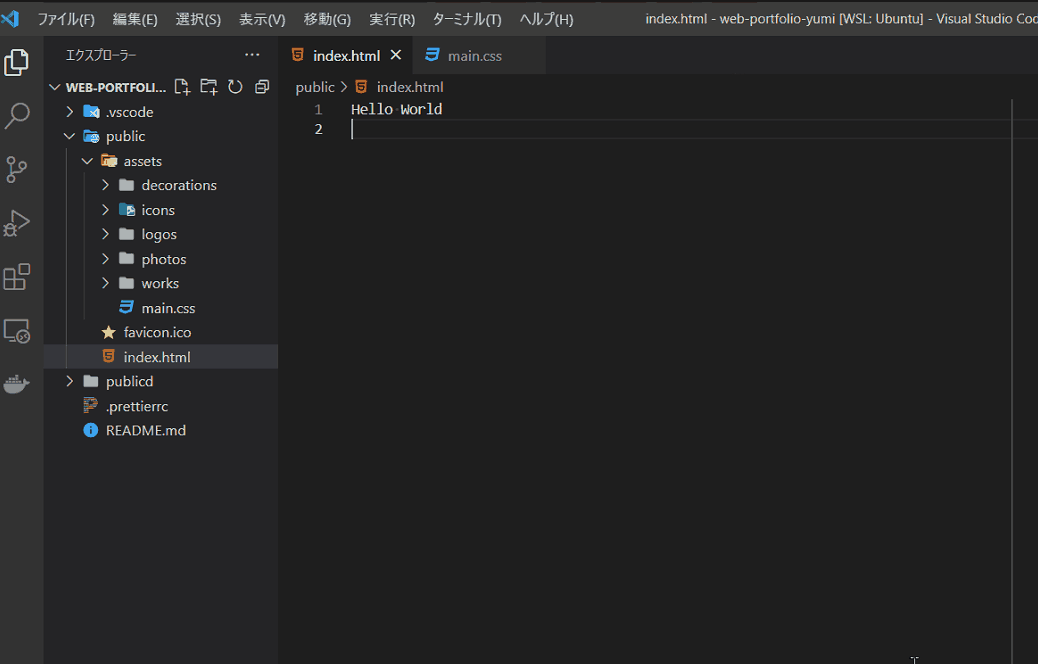
# 雛形を作成する
現時点では index.html は 「Hello World」と記載されていますが、 HTML は最低限記述すべき構文があります。
このページでは、最低限の記述と、プロジェクトに合わせたベースを整え、雛形を作ります。
# 最小の記述
以下の内容を記述しますが、Visual Studio Code ではコピーせずに入力することができます。
! と入力して候補が表示されたら Enter を押すと雛形(デフォルトの Snippet)が入力されます。
~~/public/index.html
<!DOCTYPE html>
<html lang="en">
  <head>
    <meta charset="UTF-8" />
    <meta http-equiv="X-UA-Compatible" content="IE=edge" />
    <meta name="viewport" content="width=device-width, initial-scale=1.0" />
    <title>Document</title>
  </head>
  <body></body>
</html>
2
3
4
5
6
7
8
9
10
Ctrl → Command 、
Alt
→ Option に置き換えてお読みください。
Ctrl+Aすべて選択Delete削除!文字「!」の入力EnterSnippet の選択Ctrl+S上書き保存
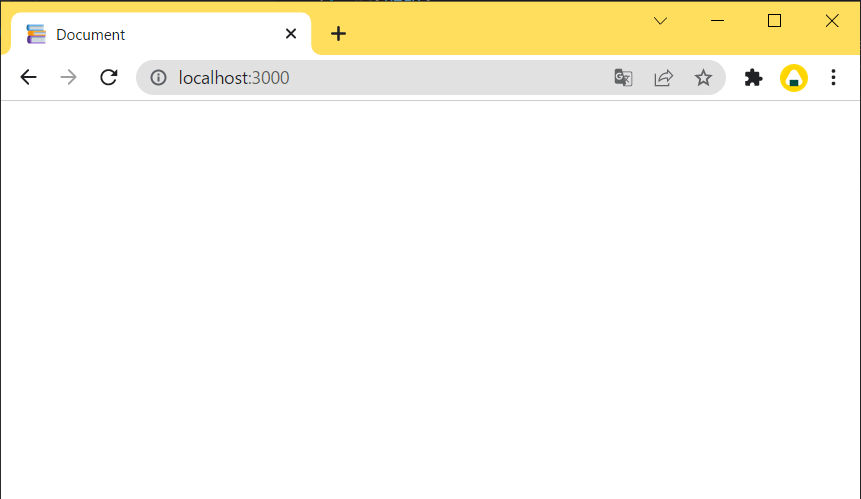
一度 Ctrl + S (Mac の場合は Command + S ) で保存し、Web ページを更新してください。真っ白な画面が表示されていれば正常です。
head タグ内に title タグを指定し「Document」と書いたため、タブの名前が「Document」になっています。
Ctrl → Command 、
Alt
→ Option に置き換えてお読みください。
Ctrl+Rページの更新
次のように変更してください。
~~/public/index.html
<!DOCTYPE html>
<html>
  <head>
    <meta charset="UTF-8" />
    <meta http-equiv="X-UA-Compatible" content="IE=edge" />
    <meta name="viewport" content="width=device-width, initial-scale=1.0" />
    <meta name="robots" content="noindex" />
    <title>Yumi's Portfolio</title>
  </head>
  <body></body>
</html>
2
3
4
5
6
7
8
9
10
11
<html lang="en">は、議論の余地 (opens new window)がありますがここでは削除します。指定する場合は日本語のため、<html lang="ja">としてください。<meta name="robots" content="noindex" />は公開時に検索エンジンに表示されないようにする設定です。 公開するものに対して普通は指定しませんが、今回は学習のために作成しているため、外部に公開する場合に検索エンジンに登録されないように指定しておきます。<title>は、 優美さんのポートフォリオのため、サイト名を「Yumi's Portfolio」にしておきます。日本語でも良いです。
こちらもチェック
- 検索「DOCTYPE html」 (opens new window)
- 検索「meta charset UTF-8」 (opens new window)
- 検索「X-UA-Compatible」 (opens new window)
- 検索「meta viewport」 (opens new window) 重要
<meta name="viewport" content="width=device-width, initial-scale=1.0" />
では、スマートフォンで表示する際に、仮想の画面サイズを使用する設定を有効にしています。
スマートフォンは、解像度が高い傾向にあるため、実際の解像度よりも小さい画素数を
使用して、小さな画面で見た際に、人間にとってちょうど良い大きさになるようにしています。
このタグを指定しない場合、スマートフォンでも PC と同じように表示(小さく表示)されてしまいます。
このタグは、画面幅に応じてレイアウトを変更するレスポンシブデザインを実装する上で、重要なタグとなります。
これで最小の記述は終わりです。
# ベースを整える
CSS は <head /> に記載することもできますが、分量が多くなりそうなので別のファイルに分けようと思います。
別の CSS ファイルは、~~/public/asstes/main.css に配置しようと思います。
プロジェクトの準備をする際に、空のファイルを既に作成していますね。
このファイルを index.html が表示されるときに読み込まれるようにします。
<link /> を使用して main.css を読み込むように指定します。
~~/public/index.html
<!DOCTYPE html>
<html>
  <head>
    <meta charset="UTF-8" />
    <meta http-equiv="X-UA-Compatible" content="IE=edge" />
    <meta name="viewport" content="width=device-width, initial-scale=1.0" />
    <meta name="robots" content="noindex" />
    <title>Yumi's Portfolio</title>
    <link rel="stylesheet" href="./assets/main.css" />
  </head>
  <body></body>
</html>
2
3
4
5
6
7
8
9
10
11
12
href 属性に指定している ./assets/main.css は、 index.html から見たときの相対的なパスを示しています。
パス
パスは、少し書き方が違うだけで全く別の場所を示したり、全く異なっても同じファイルを示していたりします。
読み込まれないと思った場合は、パスが間違っていないか、ファイル名のタイプミス(
パスの種類 例 assets ディレクトリ の中の main.css を示す場合
./assets/main.css(相対パス)/assets/main.css(ルートパス)http://localhost:3000/assets/main.css(絶対パス Web)https://tspf.netlify.app/assets/main.css(絶対パス Web)/usr/local/apache2/htdocs/assets/main.css(絶対パス コンテナ内)C:\Users\tsuser\Documents\GitHub\web-portfolio-yumi\assets\main.css(絶対パス Windows 等)/home/ubuntu/github/ts-user/web-portfolio-yumi/assets/main.css(絶対パス WSL 等)/Users/tsuser/github/ts-user/web-portfolio-yumi/assets/main.css(絶対パス Mac 等)
index.html から http://localhost:3000/assets/main.css を参照する際、それぞれ以下のように表記方法が異なります。
相対パスの場合
(../ は 1 つ上の階層を指定する書き方です。)
http://localhost:3000/abc/index.htmlからは../assets/main.csshttp://localhost:3000/abc/def/index.htmlからは../../assets/main.css
ルートパスの場合
/assets/main.css
ルートパスは、/ を起点とした参照方法です。
index.html が /abc/index.html にあっても /abc/def/index.html にあっても、
/assets/main.css で統一でき、http://localhost:3000 等、環境に依存する情報を含まないため、よく使われます。
絶対パス (ローカルで開発中の Web) の場合
http://localhost:3000/assets/main.css
HTML では、自身のサイト内のリソースに対しては、相対パスかルートパスを使用します。 このポートフォリオ制作では、相対パスで表記しています。
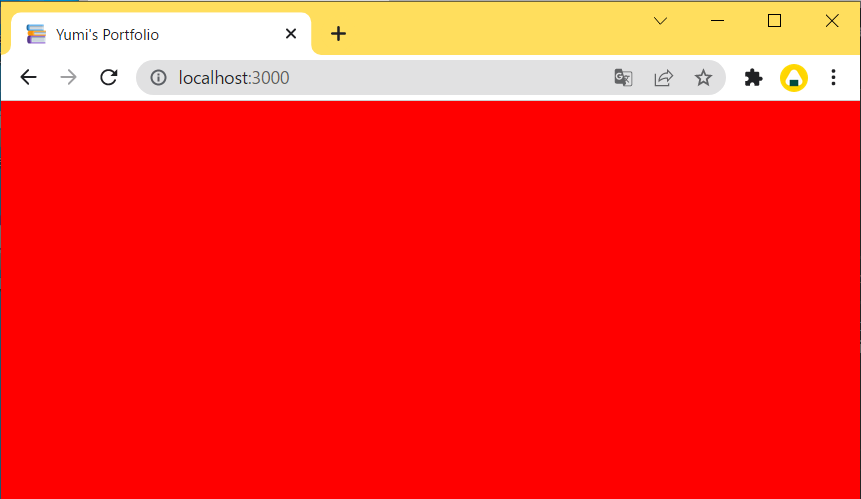
外部 CSS が読み込まれているか確認します。以下のように わかりやすい Style を指定して確認します。
~~/public/assets/main.css
body {
  background-color: red;
}
2
3
画面が赤くなれば読み込みに成功しています。もし、赤くならない場合は、キャッシュ(ブラウザ側の一時保存機能)が効いている場合があります。 キャッシュを強制的にクリアして更新してみてください。
Ctrl → Command 、
Alt
→ Option に置き換えてお読みください。
Ctrl+Rページの更新
または
Ctrl+Shift+Rキャッシュをクリアしてページ更新
~~/public/assets/main.css の内容を削除して、以下の内容に置き換えます。
~~/public/assets/main.css
@charset "utf-8";
@import url('https://fonts.googleapis.com/css2?family=Roboto:wght@100;300;400;500;700;900&display=swap');
@import url('https://fonts.googleapis.com/css2?family=Noto+Sans+JP:wght@300;400;500;700;900&display=swap');
@import url('https://fonts.googleapis.com/css2?family=Pacifico&display=swap');

/* ===== BASIC BEGIN ===== */
html,
body {
  font-family: Roboto, 'Noto Sans JP', sans-serif;
  font-weight: 400;
  margin: 0;
  padding: 0;
  font-size: 18px;
}
button {
  background-color: initial;
  border: initial;
  cursor: pointer;
  outline: initial;
  padding: initial;
  appearance: initial;
  -webkit-appearance: none;
  border-radius: initial;
  font-size: inherit;
}
li,
p {
  text-align: justify;
}
p {
  margin: 8px 0;
}
a {
  color: #e8aaa3;
  text-decoration: none;
}
a:hover {
  text-decoration: underline;
}
/* ===== BASIC END ===== */
2
3
4
5
6
7
8
9
10
11
12
13
14
15
16
17
18
19
20
21
22
23
24
25
26
27
28
29
30
31
32
33
34
35
36
37
38
39
40
ブラウザによる表示差を削減するために標準のタグに対してスタイルを適用しました。 変更の概要は以下の通りです。
全体
@charset "utf-8";文字コードを UTF-8 と明示しました。MDN: @charset (opens new window)@importGoogle フォント (opens new window)を読み込みました。
html, body
font-familyフォントを Google フォント (opens new window)の Roboto (opens new window) と Noto Sans Japanese (opens new window) にしました。margin, padding余白を 0 にし、明示しました。検索「html body margin padding 0」 (opens new window)font-sizeフォントサイズを明示しました。font-weight文字の太さを 400 (標準) に明示しました。MDN: font-weight (opens new window)
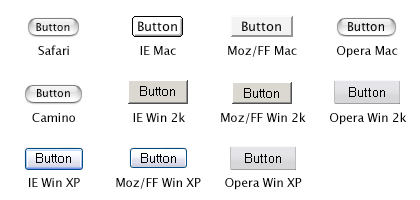
button
- 標準のデザインを削除しました。検索「css button default」 (opens new window) 検索「ios button css」 (opens new window)
※ button は ブラウザによって表示が極端に違うため、リセットします。 引用 (opens new window)
li, p
text-align文章を両端揃えにしました。検索 「text-align justify」 (opens new window)
p
margin段落の上下のみに少し(8px)余白を入れました。
a
colorリンク色を指定しました。text-decorationアンダーラインを削除しました。
a:hover MDN: :hover (opens new window)
text-decorationマウスカーソルを重ねたとき(ホバーしたとき)にアンダーラインが表示されるようにしました。
変更を確認するために、HTML に追記します。確認後に、追記した分は削除してください。
~~/public/index.html
<!DOCTYPE html>
<html>
  <head>
    <meta charset="UTF-8" />
    <meta http-equiv="X-UA-Compatible" content="IE=edge" />
    <meta name="viewport" content="width=device-width, initial-scale=1.0" />
    <meta name="robots" content="noindex" />
    <title>Yumi's Portfolio</title>
    <link rel="stylesheet" href="./assets/main.css" />
  </head>
  <body>
    あいうえお
    <a href="https://www.google.com/">Google</a>
    <div style="background-color: cyan">
      サンプル
      <p style="background-color: yellow">こんにちは</p>
      <p style="background-color: yellow">世界</p>
    </div>
    <button>Button</button>
  </body>
</html>
2
3
4
5
6
7
8
9
10
11
12
13
14
15
16
17
18
19
20
21
Ctrl → Command 、
Alt
→ Option に置き換えてお読みください。
Ctrl+Rページの更新
または
Ctrl+Shift+Rキャッシュをクリアしてページ更新
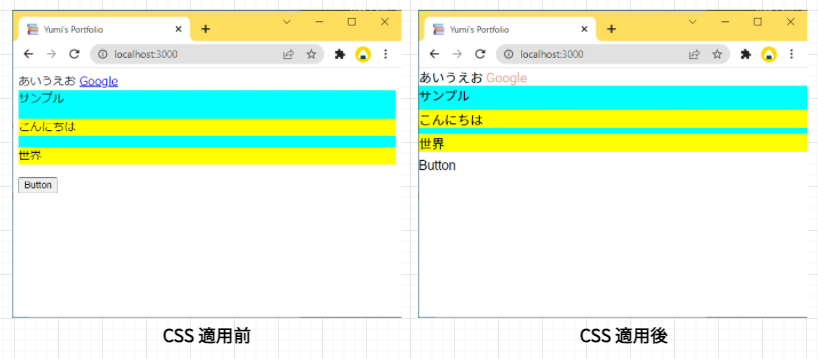
以上でベースを整える作業は終わりです。